Saturday 9 February 2013

Comfy, Deer?


Having recently put myself through the gruelling task of making my first set of curtains (a nightmare to say the least, which certainly will not be followed with a ‘how to’ blog post) I purchased way too much lovely fabric, consequently finding myself with leftovers that were just too good to for the local school textile bin.

So I decided to make a cushion! - As you do.

These cushions are easy if you have the patience and although I used a sewing machine, this is not necessarily required, although additional patience is.

What you will need is two pieces of fabric measuring 40cmx40cm (16x16”) if you head to your nearest haberdashery shop they usually have a remnants bin where you can have a rummage and find the most delightful cast-offs or end of roll scraps. Alternatively, you could just buy some fabric, and ½ meter should be more than enough. If you did want to create a silhouette design on the cushion, proceed to buy some contrasting fabric, as you can see, I went for black. You will also need a cushion pad, which again you can get from the haberdashery. You could also remove the current cover off an old cushion and use that pad instead.


Recap of materials


  • ½ meter of fabric or two pieces that will cut to 40x40cm
  • One piece of contrasting fabric – use felt if you’ve not got a sewing machine, or if you’re not that great on one.
  • Matching cotton to your main fabric
  • A template for your chosen design. If you’d like a stag head, feel free to download my template here.

So are you ready? Then Let’s get sewing!

1. Cut your fabric into two square pieces measuring 40x40cm (16x16”)

2. Use your template to cut your design out of the contrasting fabric or felt, then pin into place, centrally onto one of your square pieces of fabric.


3. Sew the design onto your fabric using a small zigzag stitch to prevent fraying. This can be tricky, I’d grab that patience from your list for this step.  
If hand sewing or using felt, you just need to securely hand sew the design into place using a running straight stitch (weave the needle in and out of the fabrics in a straight line).


4. Take the two pieces of fabric, place them on top of each other (pattern inwards) and pin into place 1cm away from the edge.  You want your pillow to be nice and snug if you’re wondering why it measures smaller than the cushion pad.


5. Now, take a seat in front of the sewing machine, blast your favourite tunes and get sewing along the pinned line.
WAIT. Take it easy as you’re only sewing up 3 of the 4 edges. Make sure that your open edge is the bottom of the cushion so your hand stitching that you’ll be doing later on will be less noticeable.
Again, if you’re hand-stitching this step, use a straight stitch.


6. Once your 3 edges are sewn, turn the fabric inside out to reveal your almost complete cushion cover. Stuff the cushion pad comfortably in it’s new home and take a moment to admire. It looks great doesn’t it?

Any patience left? I hope so as the final steps are a tad fiddly and may lead to you using vocabulary that your mother would rather you not.
Breathe. You’re almost there.

7. Carefully pinch the seam inwards, around 1cm each side and carefully pin into place.


8. Using a needle and thread, proceed to oversew the ends together. Make sure your stitches are small close together.


9. Once you’ve sewn the final stitch, take your newly finished cushion and head to a comfiest spot you can find…

It’s nap time.


N x

Isle of Wight Garlic Festival 2012

This isn't just any Isle of Wight Festival, this is the Isle of Wight Garlic Festival

Having just about washed the final stench of garlic that clung on to me, I decided it was time to finally post the pictures from last years Garlic Festival.

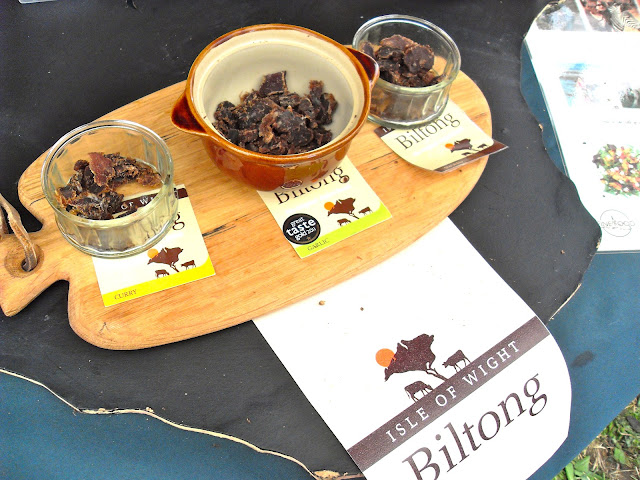
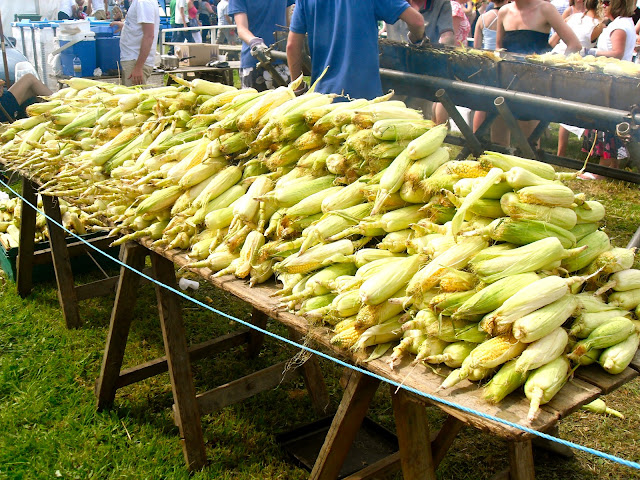
With live cooking demonstrations, archery, corn on the cob dripping in garlic butter, food tastings in almost every tent, over 70 varieties of garlic on offer, live music, antique stalls and of course practically everything edible was somehow infused with garlic, I'd pick this festival over Glastonbury any day! - Nothing to do with me being unsuccessful getting a Glasto ticket or anything. Ahem.

The only thing I wouldn't recommend is the garlic beer *shiver* that lumpy liquid still makes me a little sick in the mouth at the thought, but other than that, a stinking good time was had by all. 

The 2013 Garlic Festival takes place on the 17th and 18th August 2013
http://www.garlic-festival.co.uk/ 


N x


Saturday 18 August 2012

Picnic at Fort Victoria


I've decided to come the Isle of Wight for the weekend to stay with my Grandparents. I’ve come here for a bit of rest & recreation, the finest homemade dinners, sleeps in super comfy beds and conveniently, the Garlic Festival is in town!

We've decided to head the Garlic Festival on the Sunday, so we could spend Saturday at our leisure. So we packed up our sandwiches and headed to Fort Victoria for a picnic to enjoy an afternoon overlooking the Solent under the sun, once it decides to surface.


Fort Victoria was built on the north shore of the Isle of Wight to guard the Solent. The remains of Fort Victoria now house a Marine Aquarium, an Underwater Archaeology Centre a Planetarium and a Model Railway.


When we arrived, my Grandad educated me with points of interest beyond the water. Grandma looked at some photographs and then together we watched on rather impressively at the dozens of yachts go by and also as a man water-skied through the strong currents and choppy waves.


We ate cheese and chutney mini ciabattas, fruit and M&S baked goods, all which were washed down flasks of milky coffee.


Whilst waiting for the sun to come out, my grandparents read, while I played with the binoculars, painted my nails... 


...and napped.

After over two hours of enjoying the salty sea breeze and surprisingly pleasant low clouds, we decided to call it a day. Plus better sun-tans could be achieved from their garden, where apparently the sun shone all afternoon!

N x

Monday 23 January 2012

The Python Pedicure - (Although mine's a Mani)

There's not many a beauty treatment that I wont try, if it promises to give me flawless skin like Penelope Cruz or beautiful, glossy hair to rival Kate Middleton's then sign me up. This new treatment, however seemed to come with no beauty promises, other than plenty of bizarre and possible looks of disgust from strangers and a risk of pissing off animal rights group, PETA. 


Sure! Where do I sign?


I first heard about this unique concept when I was nestled in the back of a New York taxi last year with my sister. We were fixated on the tv screen in-bedded in the back of the cab, rolling footage of a Botox pumped American woman speaking of this latest 'celeb nail craze'. Naturally, we were gobsmacked at the idea and presumed it would never take off. 'Crazy Americans' we whispered to one-another (the New Yorker ferrying us up front looked a little too scary for us to risk him overhearing such comments!)


But it's slithered its way across the pond, Ladies and Gentlemen, let me introduce to you... REAL Snakeskin nails!


Having heard that this bespoke treatment had exclusively hit a spa in Chelsea, I nearly fell off my chair when I was offered the chance to go for a treatment! 
Too experimental to opt for the just two nails applied and way too embarrassed to put my unattractive feet forward for the pedi, I decided on the manicure. The Hand and Foot Spa in Chelsea is currently the only salon in the UK offering this treatment, I was also hoping that being in such a prestigious area I would inevitably be sandwiched in-between Caggie and Milly where would giggle and gossip at how Hugo is like, not even hot and how we totes prefer Spencer with his new, relaxed hair and plaid shirts yarh. - No such luck, I had the first appointment of the day, meaning I was the only one in the salon. Nevermind. My Chelsea drink of choice (Super Skinny Soy, Chai Tea Latte, hold the cream, hold the taste) would be a great companion. 


Sitting comfortably, my technician whipped out a sandwich bag where slept the shedded snakeskin. Yikes, maybe this is a bit gross. Not being one to back out of a challenge, I continued to sit still whilst each nail was crafted and painted then pieces of the Snakeskin (which is sterile and sourced from a nature reserve FYI) were individually cut to fit each nail. Once the nails were painted with product, the Snakeskin individuals were stuck to the residue left behind on the base colour. A clear BioSculpture gel was then applied and set under a UV light. And that's pretty much it! - Oh, and did I mention that this treatment takes just over two hours? Wow, my technician had some serious patience, especially with me firing questions at her with every buff.


The nails are fairly thick, due to the layers of gel encasing the Snakeskin and the manicure can last up to six weeks if nails are looked after, but the average life span is around two. If you're interested in giving it a go, its a pretty pricey procedure coming in at £62 per nail or £160 for a full manicure, making it an expensive experiment, although a interesting conversation piece.


I waved my newly adorned talons along the Fulham Road as I skipped back to my car, of course stopping to press my nose against the beautiful boutique windows as frequently as possible. Still no signs of Cags or Mills, maybe they'll find me next time I'm in town. 


Natalie x